
A selection of the BASEG group meet last weekend to discuss the options for two trips back to Tenerife and the Mount Teide plateau. This meeting of some eight members was kindly hosted by the recently retired Dave Shave-Wall.
Author: Gingergeek
Atik460 CCD Service
The cooling fan on my Atik460EX mono CCD started to make a disturbing sound one Spring night during an imaging session setup. Given it is some six years old I decided it was time for a much overdue service.
I contacted Atik support via email and enquired on the cost of a service. The reply was quick, the estimate for a fan replacement/service was around £80 exc vat and shipping. I sent it via Royal Mail insured/recorded delivery and I was updated when it was received at the office. I was updated again when it had returned back from the labs in Portugal ready for delivery to me. This allowed me to make arrangements to be at home in order to sign for the parcel.
Atik support informed me that the failing fan had been replaced, a faulty temperature sensor replaced, the desiccant recharged and the Sony CCD sensor cleaned.
Previously the 460 struggled to reach 15-20℃ below ambient when the product literature states that the device should be capable of reaching 25℃ below ambient. This was a real problem during the recent summer nights where the CCD barely reached 0℃ at full power.
Once I was told the temperature sensor was faulty then suddenly made my past cooling experience made sense. I performed some simple tests in a 14.7℃ ambient temperature room via a PegasusAstro Environmental Sensor. At 100% power (1A single stage Peltier cooler) I was able to get the CCD down to -18℃. Now the CCD can run happily at 100% power all night without detriment but I set the cooling temperature to -10℃ and the power usage dropped to 73%, which was a ~25℃ delta.
All in and all I’m happy that the camera so is now back to functioning normally as it should. It is now in a better shape ready for the up coming BASEG trip to Southern France in September. I guess now is the time to create a new darks library for the various temperatures I’m likely to use.
Thank you to Jo and Andrew at Atik Support for the great service.
Review – Pegasus Astro FlatMaster Panel
Whilst we were at the Professional Astronomy Show 2019 (PAS) held at Kettering I bumped into the Pegasus Astro guys. Now having already purchased and use a Pegasus Ultimate Power Box , I was keen to see what new products they had coming out.
The one product that immediately caught my was a flat panel, this was very timely as my DIY flat EL panel had broken the month before. The panel was not available for purchase at the time but Evan stated it would be shipping shortly after.
 A month or so wait and the UK Pegasus distributor Altair Astro was advertising the availability of the panel for £125. Another week or so wait after ordering and it arrived in early May.
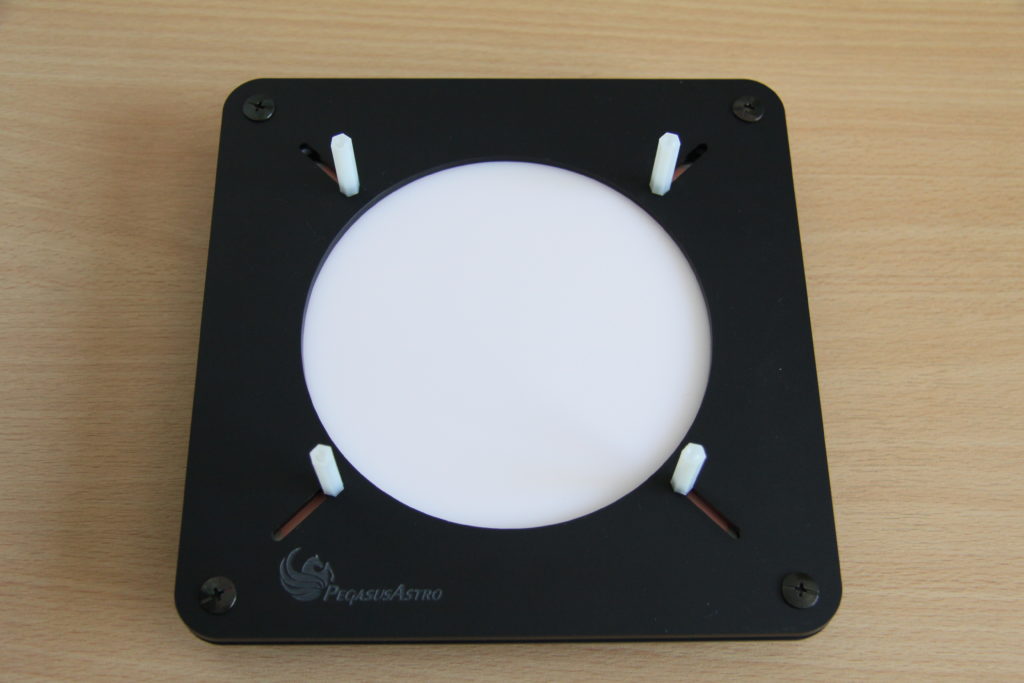
With a useful travel bag, adjustable spacers, USB2 cable, only 180 mm x 180mm x 9mm size and 300g in weight it makes for an ideal portable light panel for garden and travel. The panel can support illumination up to lens diameter of 120 mm. The pegs are removable and adjustable to support dew shield diameters up to
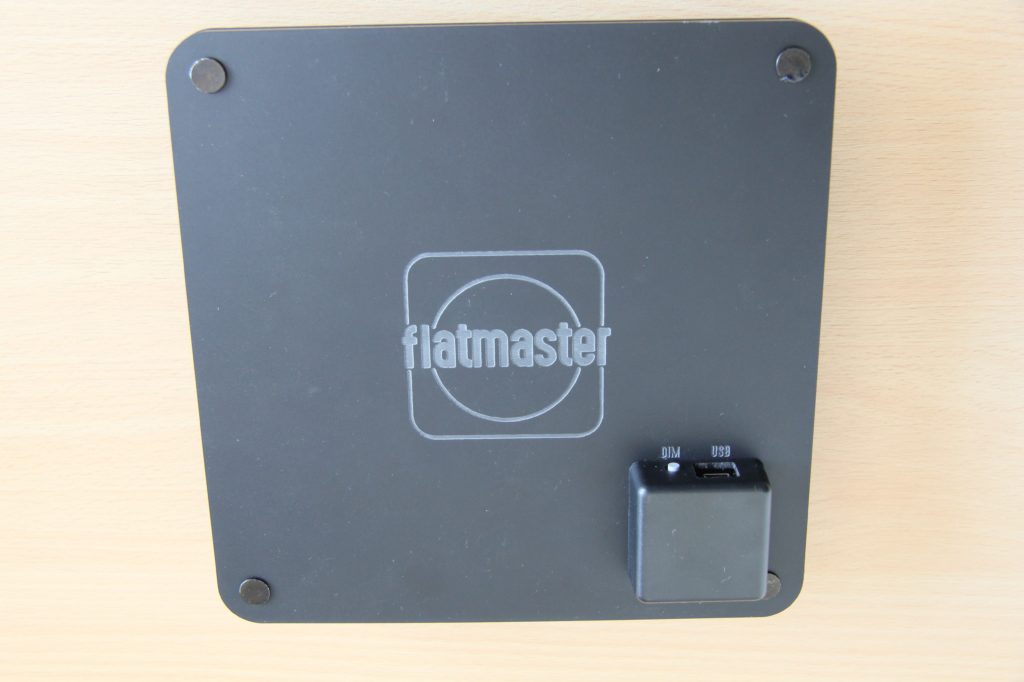
The required 5 volts is delivered via the USB2 mini connection is at the rear of the panel along with the manual dimming control (5 settings).
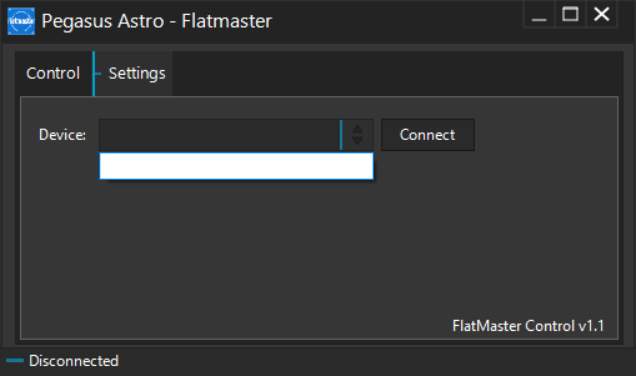
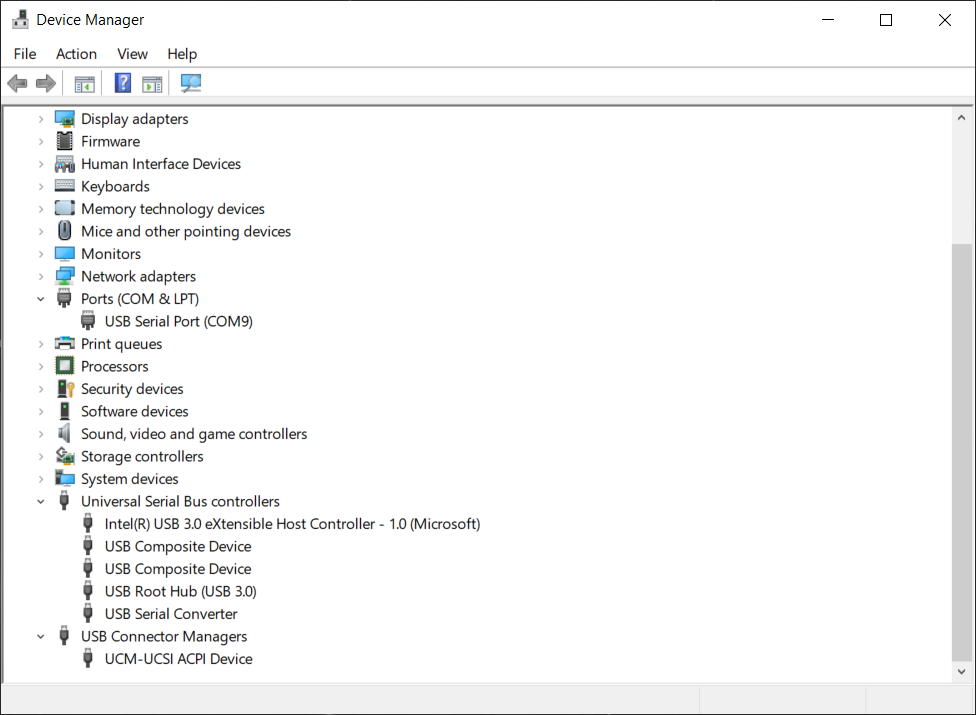
Connecting the panel to the computer will result in the panel being at maximum brightness by default. Unfortunately the FlatMaster software could not see the USB-COM port even though the Windows Device Manager could on COM9 🙁
I received the parcel on a Saturday so I wasn’t expecting any reply but I sent a quick email to Ian at Altair Astro to inform him of the issue. Fortunately for me Ian answered promptly and after a quick exchange of information he forwarded it onto Pegasus Astro. On the Sunday I was pleasantly surprised to have an email from Evan requesting to Teamviewer into my PC to diagnose the issue. It didn’t take Evan long to locate the issue with the USB identity, remotely update the EPROM and then the panel software could connect to the flat panel – version 1.2 was released with the updated change.
At the moment the flat panel can only be driven by the Pegasus FlatMaster software but according to Evan there will be an imminent SGPro release. That means it will support the panel via the ASCOM switch driver at which point I should be able to use the SGPro Flats Wizard feature.
My gratitude to Altair Astro and Pegasus Astro for resolving the issue so promptly.
Update – 01/08/2019 The recent beta version (3.1.0.211) of SGPro now has support for the FlatMaster.
BASEG admitted as a FAS member
Back in April 2018 BASEG was accepted by the FAS (Federation of Astronomical Societies) as a member, see the announcement.
Preparing for my first Tenerife trip
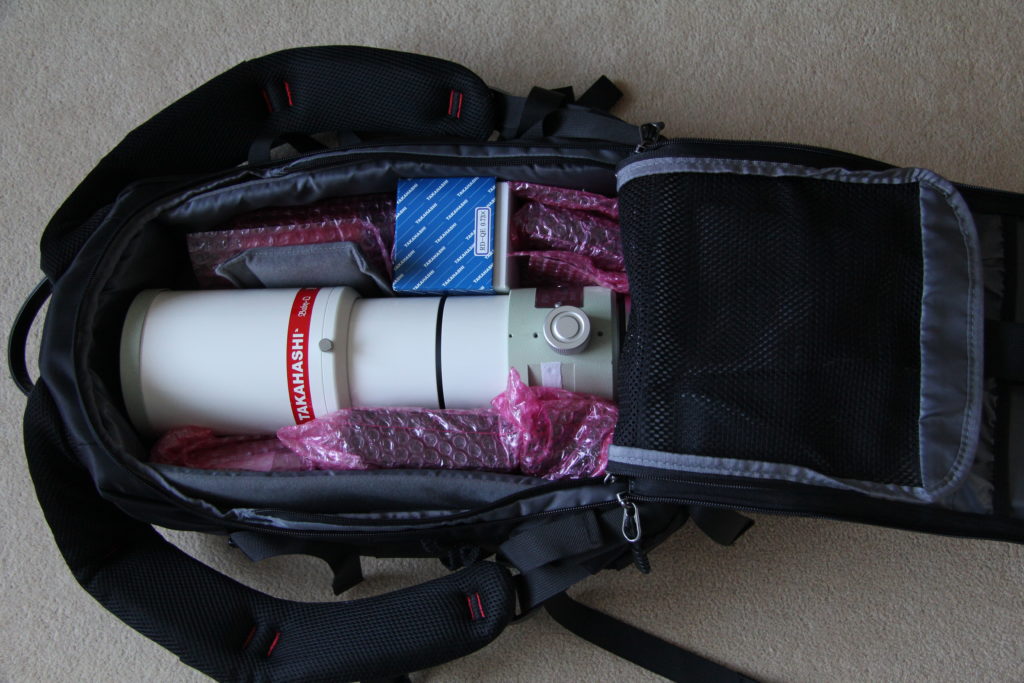
So since I don’t have a mobile setup like the veterans of the group I’m resigned to fact that I need to take most of my UK setup with me abroad. This means some serious weight to transport, so basically I have the following to pack and carry :
- Hold bag1 (~18Kg)
- Skywatcher NEQ6 mount
- Hold bag2 (~18Kg)
- Skywatcher Tripod (7Kg)
- Counterweight (5Kg)
- Box of accessories (~6Kg)
- PSU, cables etc
- Clothes …. I guess
- Cabin bag1 (~7Kg)
- Tak FSQ85
- Tak focal reducer
- Atik 460 CCD imaging camera
- Lodestar guide camera
- PoleMaster camera
- Lakeside focuser control unit
- Unihedron SQM
- ADM Scope plate
- Cabin bag2 (~6Kg)
- Atik EFW2 and filters
- Laptop & NUC
- Various digital items (GPS, USB hard disk etc)
- ADM mount puck and scope rings
Hopefully the scope bag will in in the overhead with it’s precious contents….don’t drop it ! The laptop bag should fit under the seat….hopefully.
I won’t be sure on the final weights until the digital handheld scales I’ve ordered arrive tomorrow.
At the moment I’m just finishing the calibration and setup of the Lakeside focuser and it’s configuration in SGPro.
Update : The digital scales arrived so now I have weights for a few items and move things around a bit –
- Hold Bag1 = 19.3kg
- Hold Bag2 = 22.5Kg
- Cabin Bag1 = 8kg
- Cabin Bag2 = 8.85Kg
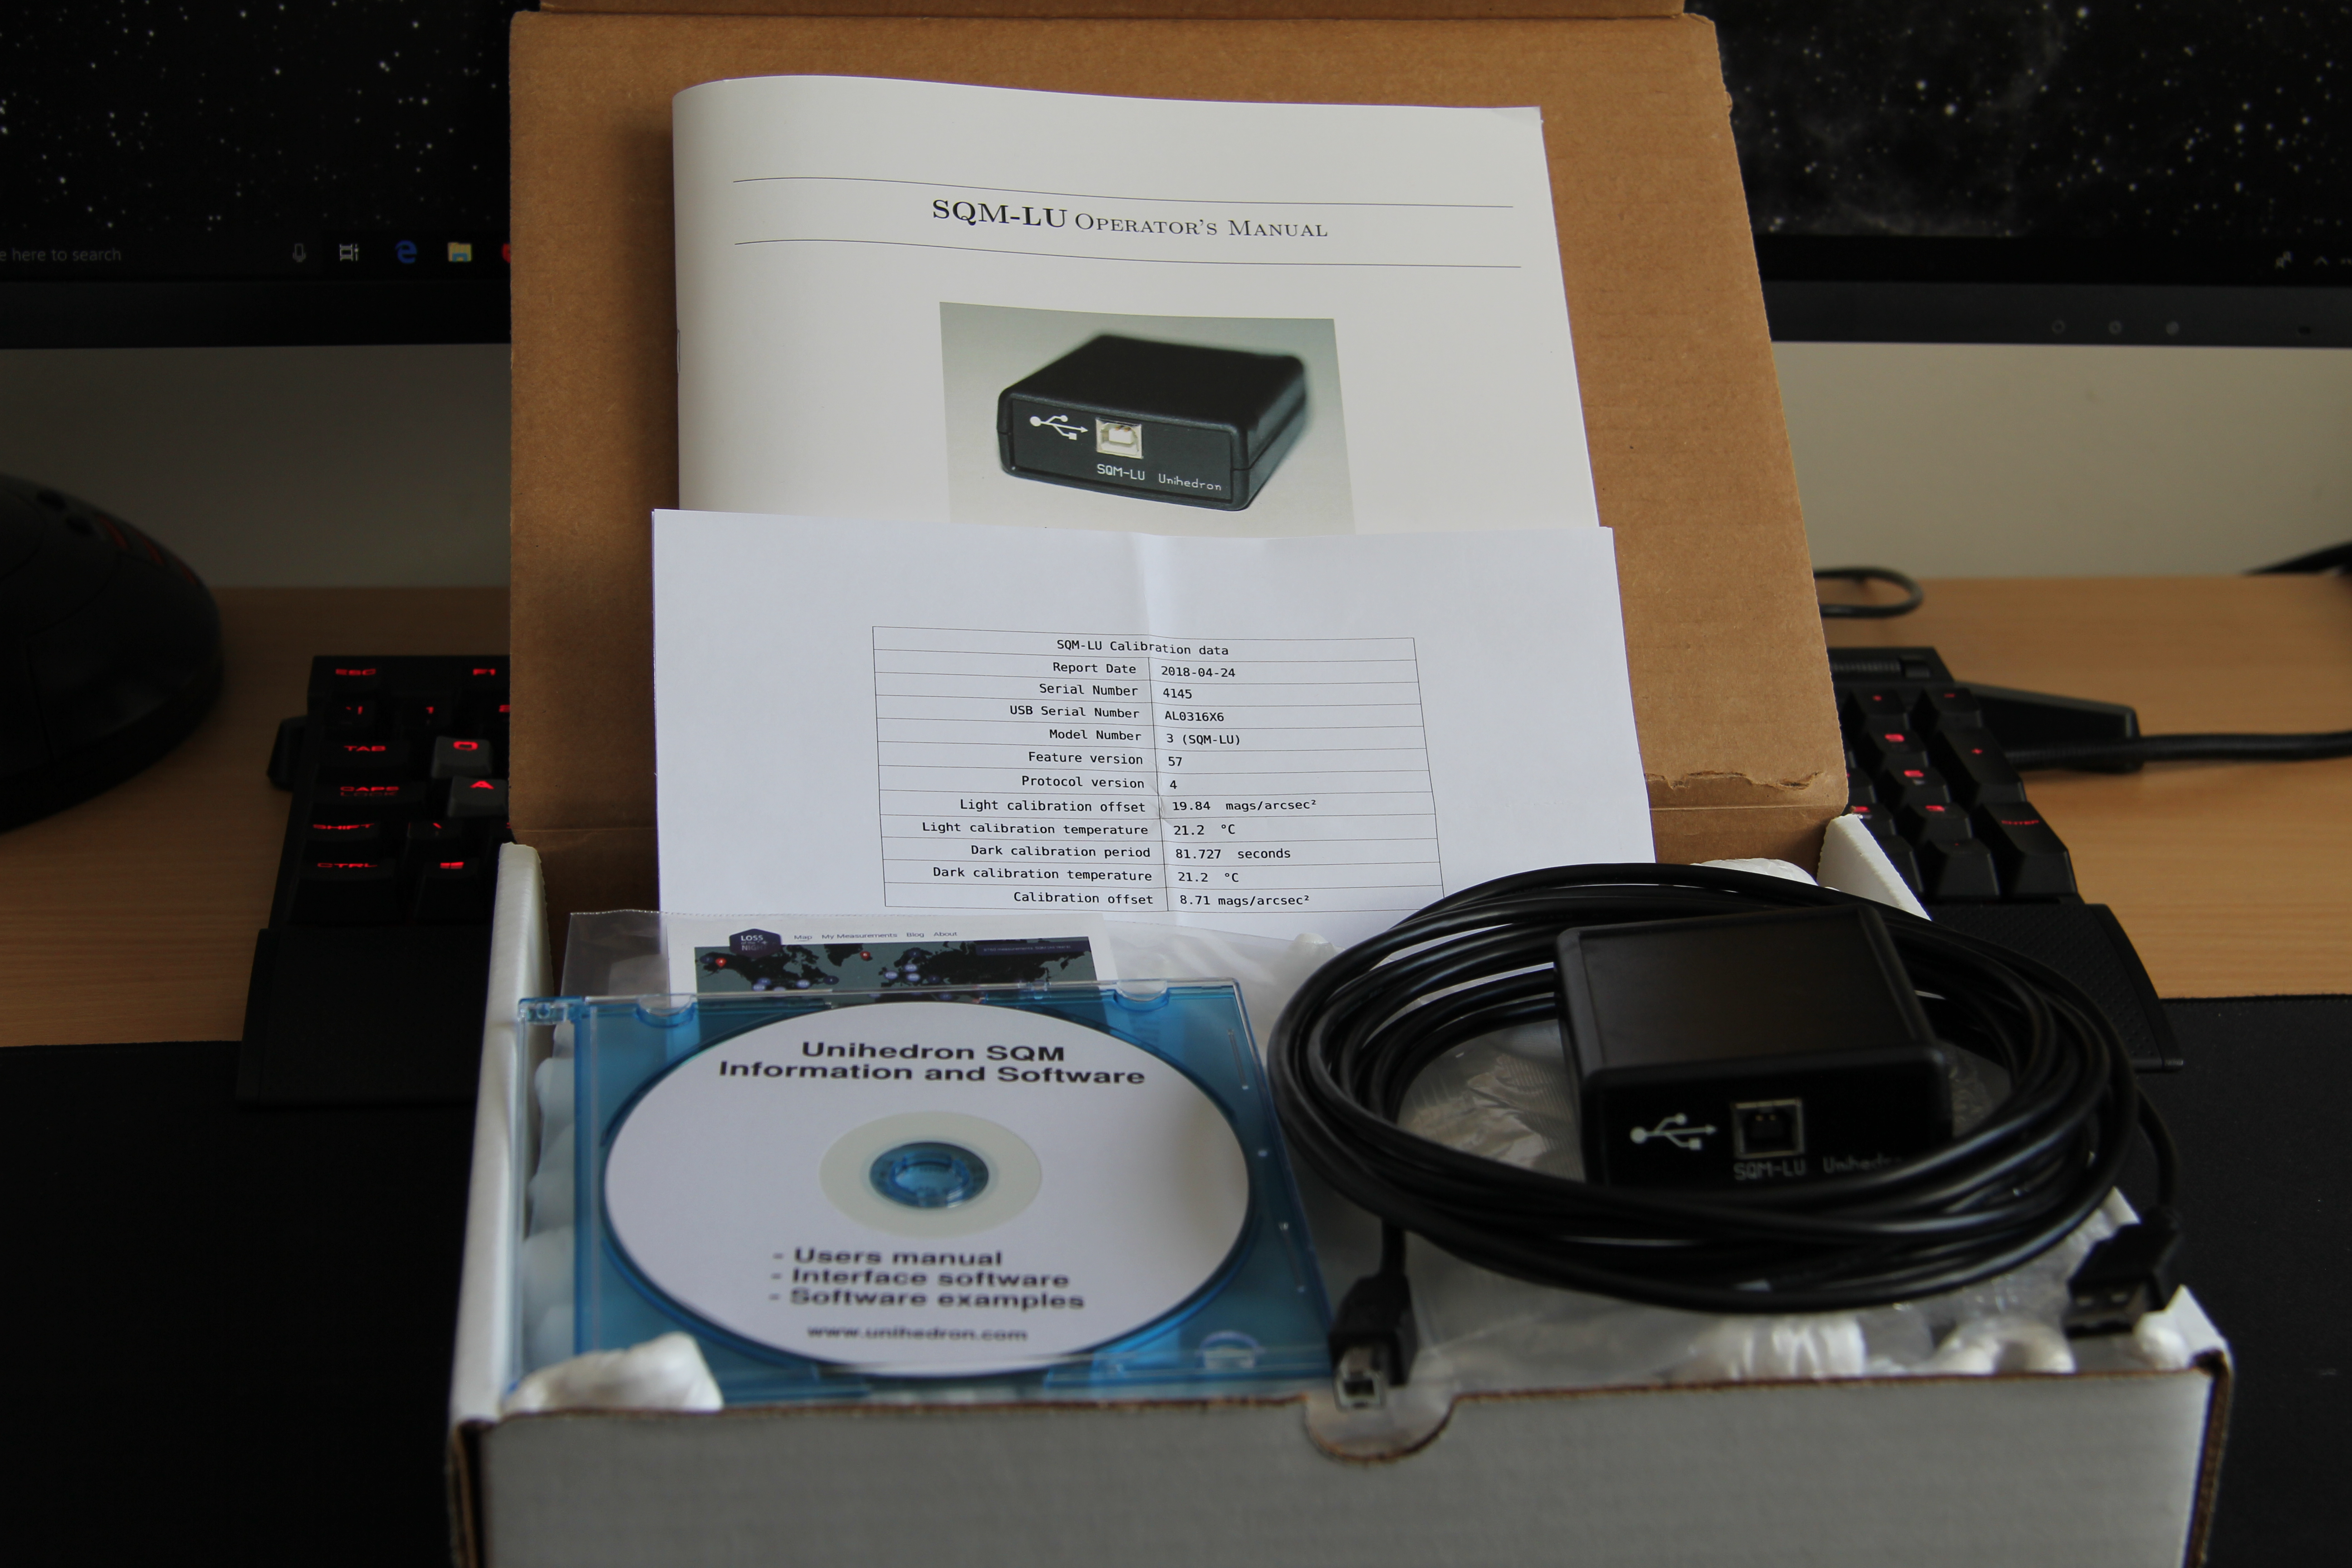
Sky Quality Meter
So I recently received from First Light Optics (FLO) the Unihedron Sky Quality Meter (SQM-LU) USB device. The box contained the SQM-LU device, a 2 metre USB cable, CD containing all the necessary software, a hard copy of the user manual and a calibration report.
 The device was already factory calibrated and was shipped with latest firmware. The Unihedron Device Manager (UDM) is the standard way to access the device and provides all the necessary options for a simple plug and play experience.
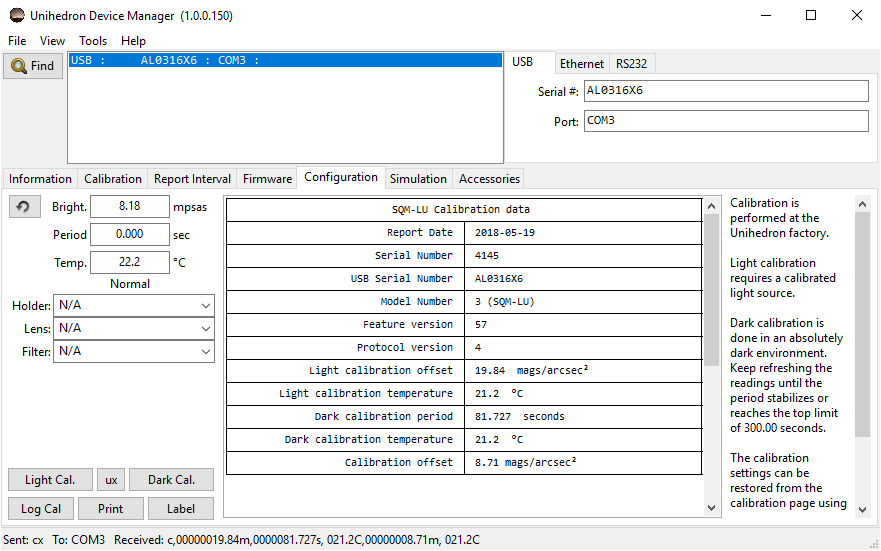
The device can also be connected to a GPS device via the configuration tab to get the location and time so it can be written to the data headers. Measurements can be written on a configurable interval and the file can even be transferred to a remote machine via FTP or SCP (not tested yet). There is even a simulation mode for when you want to just test the device during the daytime.
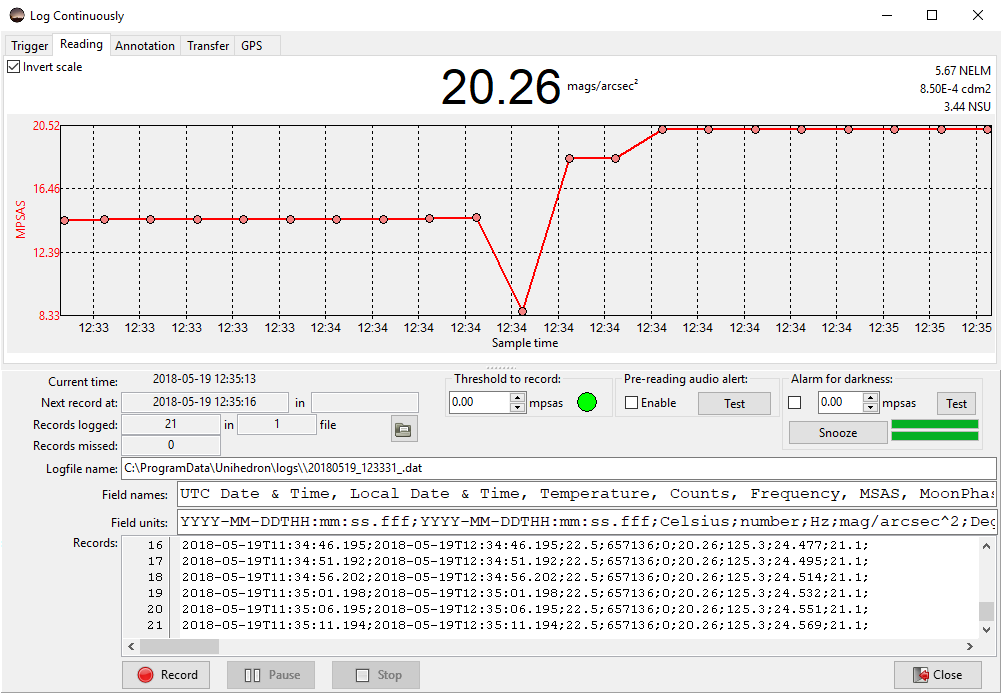
The log file structure and protocol is well documented shown above but summarised below
# UTC Date & Time, Local Date & Time, Temperature, Counts, Frequency, MSAS, MoonPhaseDeg, MoonElevDeg, MoonIllum
# YYYY-MM-DDTHH:mm:ss.fff;YYYY-MM-DDTHH:mm:ss.fff;Celsius;number;Hz;mag/arcsec^2;Degrees;Degrees;Percent
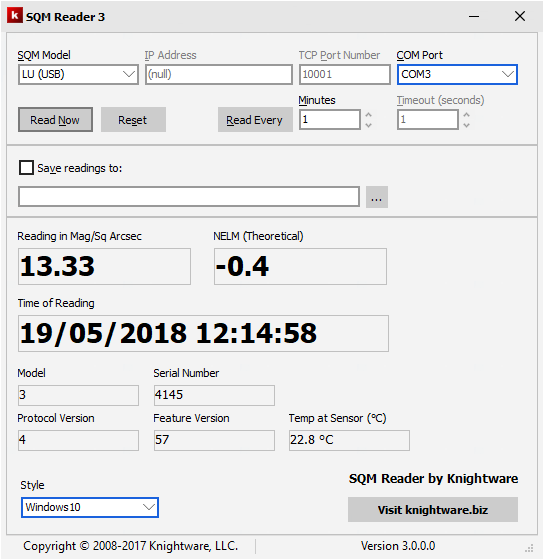
There are included examples on the CD showing how to connect the device directly using various languages such as Python and via a RaspberryPi. There is also a freeware program SQM Reader3 with basic functionality that can be used instead of UDM, they also produce a more fully functional program (SQM Reader Pro) at a cost.
There is a third party ASCOM driver that allows integration with imaging automation software such as SGPro via the ASCOM Observing Conditions Hub
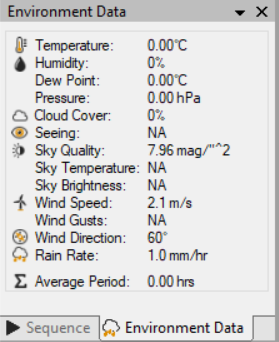
and this value is written directly to the FITs header (SKYQLTY field) of your acquired image.
This device will of course will be joining us on the trip to Tenerife so the measurements can be provided to all and sundry.